
Setting up an SVEditor Project
Before editing source with SVEditor, an SVEditor project must be created and configured. There are five steps to setting up an SVEditor project:
- Create an Eclipse project around the source
- Set variables to point to external sources
- Create an argument file to specify the root files
- Specify SVEditor project properties
- Rebuild the project and check results
This step-by-step guide will use the UBus example, provided as part of the UVM package, as an example.
Create an Eclipse Project
The first step in setting up an SVEditor project is to create an Eclipse project around the source to be edited. In the case of this example, the source that we are most interested in is the source for the UBus testbench environment.
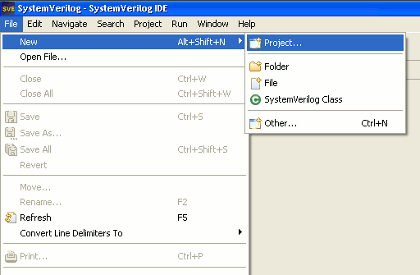
Begin creating an Eclipse project by selecting New->Project... from the main menu, as shown below.
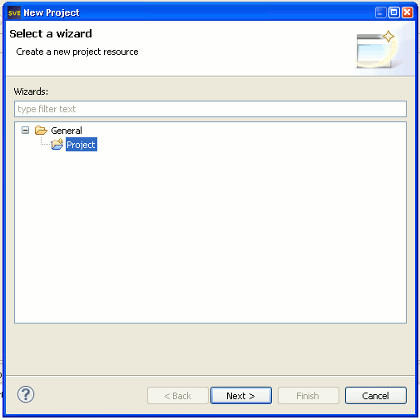
Expand the General category, if required, and select Project, as shown below.
Next, the project name must be specified and the physical location of the source files selected. To do this:
- Specify the project name as ubus
- Uncheck the Use default location check box
- Select the location Browse button, and navigate to the directory where the source is
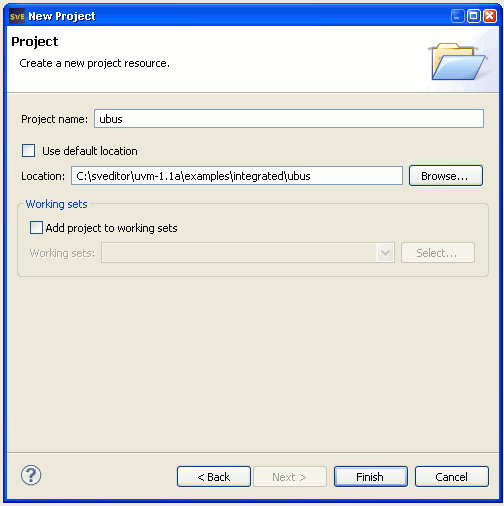
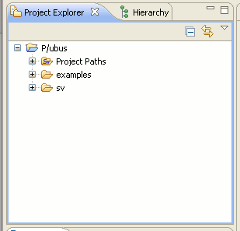
Select Finish to create the project around the existing UBus source. The new ubus project will be shown in the Project Explorer, as shown below.
Set External-Source Variables
Many, if not most, testbench environments use some external components. These components could be verification IP, components that are shared across projects, or verification methodology libraries. One of the easiest ways to reference these external components is to define a variable that points to the external source.
| Note: If an environment variable points to the external component, this variable can be used directly. There is no need to define a variable, as described in this section. |
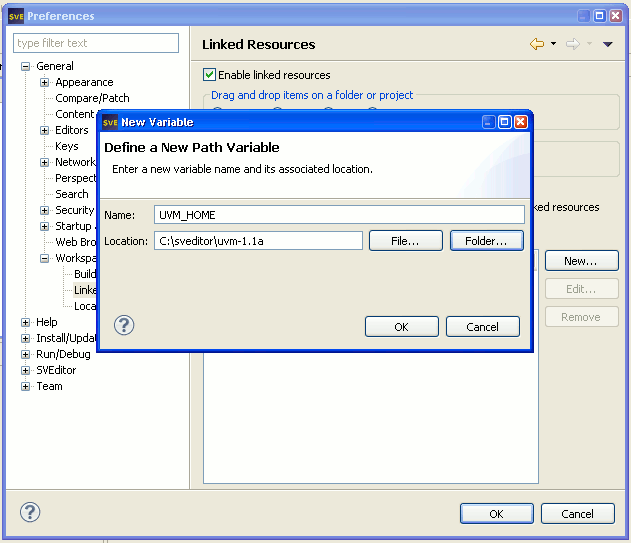
The ubus project depends on the UVM library. We will define a variable named UVM_HOME to point to the installation location of the UVM library. We will refer to this variable when specifying the files for SVEditor to parse.
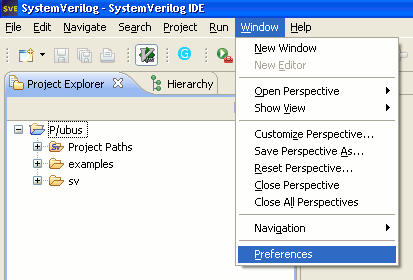
Select Window->Preferences from the main Eclipse menu, as shown below
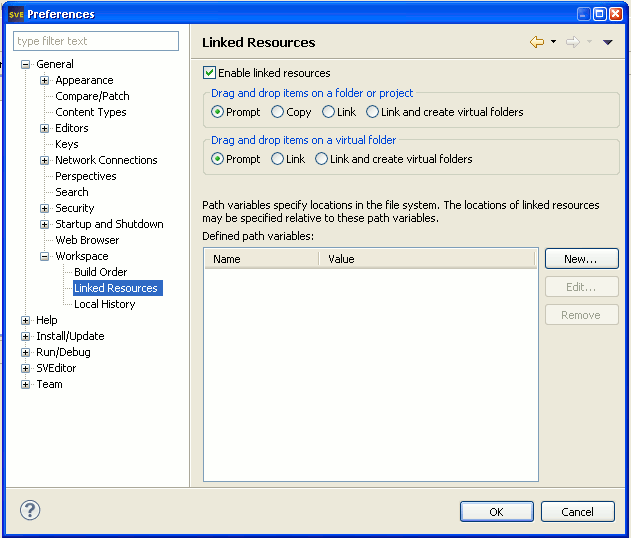
Navigate to the General->Workspace->Linked Resources category, as shown below.
Select the New button, and specify the name of the variable and path to the file or folder. In this case, we specify UVM_HOME as the variable and the location where the UVM library is installed.
Create Argument Files
Source files, include paths, and other directives are specified to SVEditor via an argument file. Argument files should have a .f file extension.
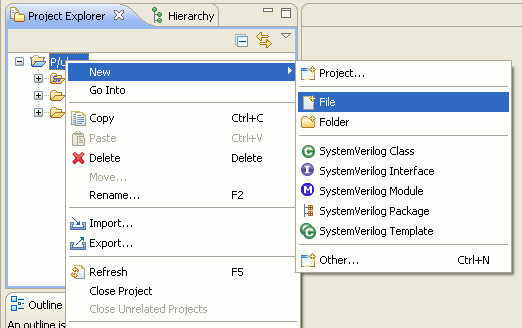
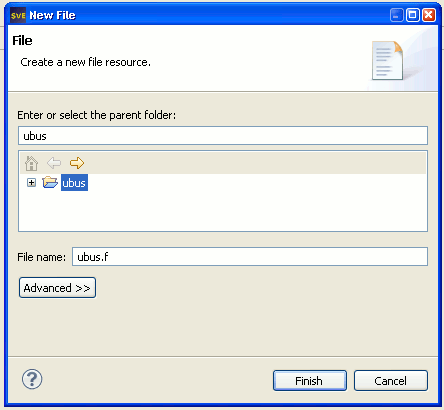
For the ubus project, we will create a single argument file to specify file and include paths. First, select the ubus project in the project explorer, and select New->File... from the context menu as shown below:
Specify the name of the new file as ubus.f, as shown below, then select Finish.
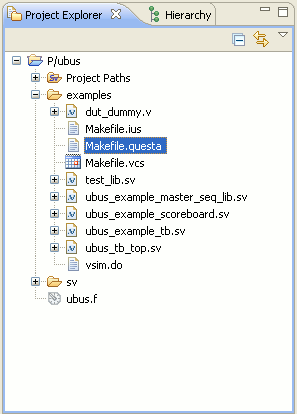
Now, we need to determine the file paths that should be specified in the argument file. Currently, the ubus project uses a Makefile to compile the sources. Expand the examples sub-directory of the ubus project, then open the Makefile.questa file, as shown below.
Locate the comp target within the Makefile. From the compilation command we can determine the files that must be specified to SVEditor.
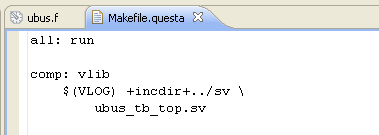
From this command we can see the following is required:
- Specify an include path to sv directory
- Specify examples/ubus_tb_top.sv as a source file
Unfortunately, we're not quite done yet. The UVM examples specify core include paths and root files as part of the definition of the VLOG variable. The VLOG variable is defined in the common Makefile.questa file, as shown below:
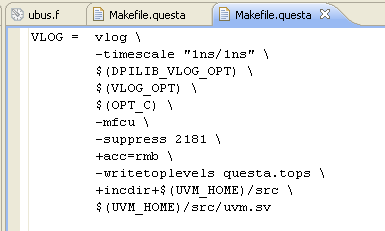
From the definition of the VLOG variable, we can see that we also need to specify the following:
- Specify an include path to ${UVM_HOME}/src
- Specify ${UVM_HOME}/src/uvm_pkg.sv as a source file
Enter the following information in the argument:
- +incdir+${UVM_HOME}/src
- ${UVM_HOME}/src/uvm_pkg.sv
- +incdir+examples
- +incdir+sv
- examples/ubus_tb_top.sv
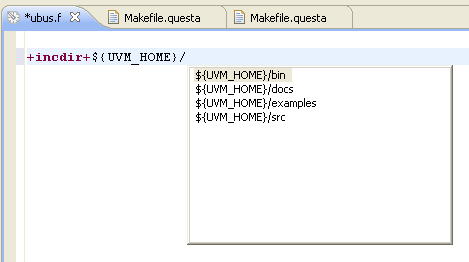
Note that content-assist for paths in the argument file can be triggered with CTRL+SPACE. The screenshot below shows content assist being invoked on the ${UVM_HOME} directory.
The final argument file should look like this:

Specify Project Properties
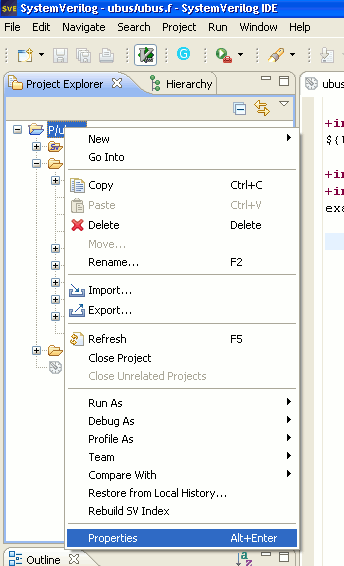
After setting up the argument file, we now must configure the ubus project to point to the argument file. Select the ubus project as shown, then select Properties from the context menu.
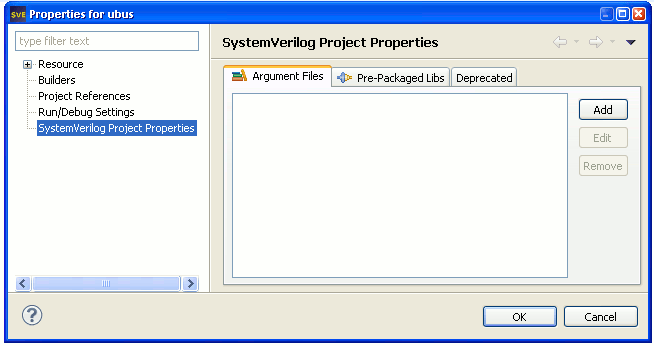
Select the SystemVerilog Project Properties category, as shown below.
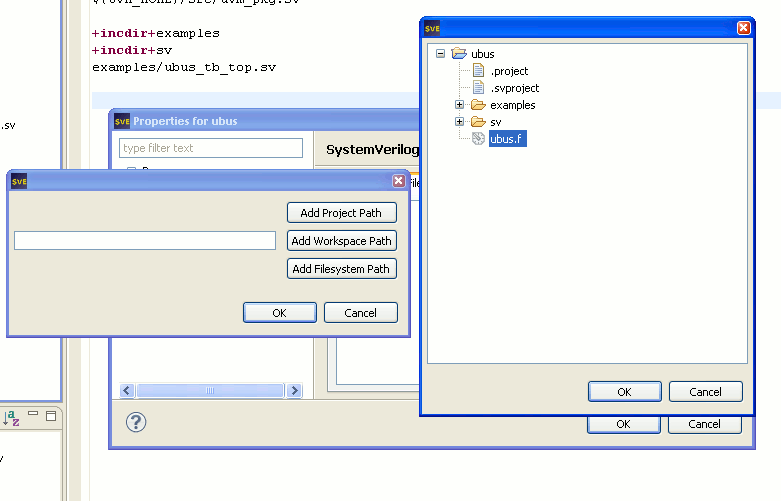
Now, select the Add button to add a new argument file. Select the Add Project Path button in the resulting dialog, then select ubus.f in the file browser, as shown below.
Rebuild Project and Check Results
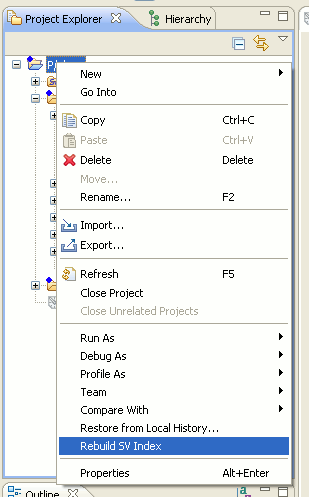
Finally, we need to rebuild the project index and confirm that the project paths are properly specified. Rebuild the index by selecting the ubus project, then selecting Rebuild SV Index from the context menu, as shown below.
After the project index is rebuilt, source files managed by the index will be shown with a small blue dot in the project explorer, as shown below.

Note that the source files, and files included by the root files, are annotated with a blue dot. Note that files that are not included in the index, such as the Makefiles, are not annotated with a blue dot.
Resource Filters
On larger projects it becomes useful to have Eclipse ignore selected resources or include only selected resources. Files to exclude are typically generated files, that just add clutter to the Eclipse workspace. Examples may include:
- Compiled Verilog code
- Binary files
- Log files
These can be configured in the Verilog Properties as follows:
- Open up the Project Properties as shown above
- Go to the resource filters ( Resource > Resource Filters)
- Include / exclude files & folders as applicable
Note: When this is done your Project Explorer view will reflect these changes (not show resources filtered out / be limited to selected resources), and Open Resource Ctrl+Shift+R will no longer list excluded resources.
Automation of Project Creation
It is reasonably easy to automate the generation of the project files used by eclipse to work on your project and save having to go through all the steps above each time you create a new user area / switch projects.
Please refer to the Automating Project Setup page for more details.